This summer Bjorn was fortunate enough to travel to Japan with a couple of friends, and experience a culture about 7.5 thousand kilometers away from his home in Canada. Join him for his series on his adventures in Japan, starting with all the planning that this vacation took and his travel to Japan for what would be his most expensive and most exciting trip yet.
Planning Our Vacation to Japan
The planning began nearly 8 months before the trip when my friends reached out to me and mentioned that they were thinking about travelling to Japan and asked if I wanted to join. I’m sure you can put together what my answer was. I was set to finish my art therapy diploma program before the trip so I convinced myself that I could use my future graduation as justification for such a grand gift to myself.
The first step to making this official was getting the plane tickets. The moment that I pressed ‘purchase’ and received the confirmation, I felt butterflies in my stomach. It was really happening! Soon I would be travelling across the world for an unforgettable vacation.
We began by researching what to do while we were in Japan and made a list of everything we wanted to see or do. We would discuss what we felt was a must see and what would be something to add if there was extra time. Thankfully for my friend group, we were able to peacefully decide what made the cut. The trip would also last two weeks giving us enough time to see most of what we wanted to anyway.

Our Itinerary for Our Vacation to Japan (at a glance)
- Day 1 – Tokyo
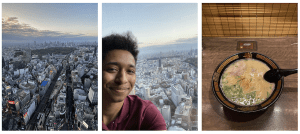
- teamLab Planets Tokyo
- Pokemón Center Tokyo DX
- Day 2 – Tokyo
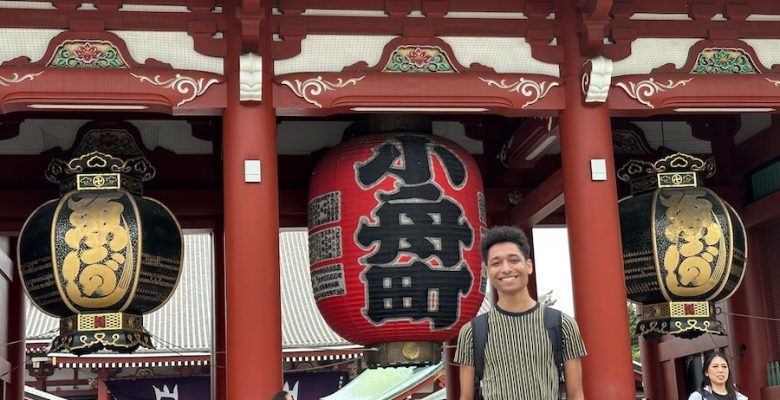
- Asakusa
- Akihabara
- Pokémon Center Mega Tokyo & Pikachu Sweets
- Day 3 – Tokyo
- Shibuya
- Day 4 – Tokyo
- Sanja Matsuri at Senso-ji Temple in Asakusa
- Day 5 – Tokyo
- Ueno Park
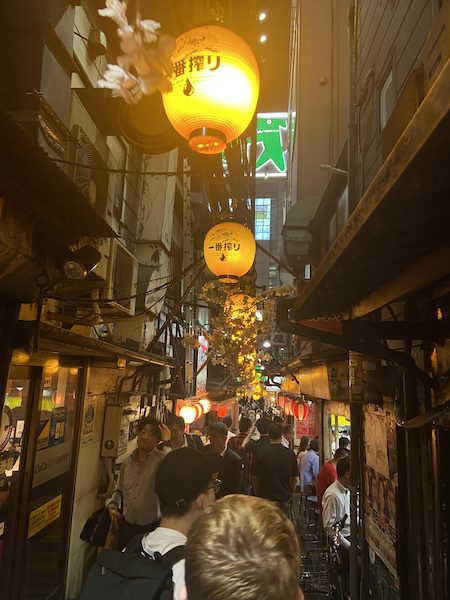
- Omoide Yokocho
- Day 6 – Tokyo
- Chukasoba Ginza Hachigo
- Shibuya
- Day 7 – Kyoto
- Kiyomizu-dera Temple
- Fushimi Inari Taisha
- Day 8 – Kyoto
- Tenryu-ji Temple
- Arashiyama Bamboo Forest
- Arashiyama Monkey Park
- Kinkaku-ji
- Day 9 – Osaka
- Pokémon Cafe
- Osaka Aquarium Kaiyukan
- Day 10 – Osaka
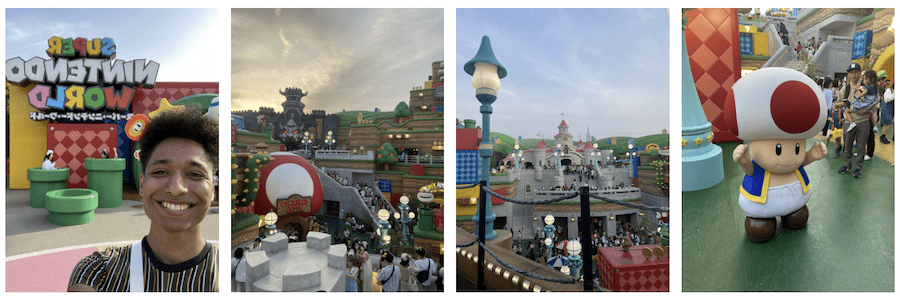
- Super Nintendo World at Universal Studios
- Day 11 – Tokyo
- travel and rest day at Wagokoro
- Day 12 – Tokyo
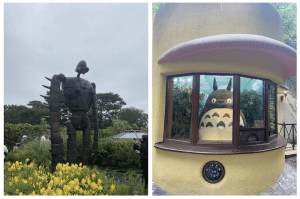
- Ghibli Museum
Booking Our Accomodations in Japan
We found all of our accommodations through Airbnb, although some of the places we stayed were actual hotels that had profiles on Airbnb. You could use the site to browse options and book directly through the hotel’s website or take advantage of the Airbnb’s user friendly interface. I would recommend exploring and see where you can get the better deal. For a trip as big as this, every cent counts.
Here are the choices that we made:
- In Tokyo:
- In Kyoto:
After making our itinerary and making bookings throughout our planning process to spread out our payments, the time had finally come to complete the pre-arrival procedures. The hotel we would first arrive at required a copy of our passports in advance, in accordance with Japanese Law. As Canadians, we also needed to complete the digital forms on Visit Japan Web, the country’s immigration and customs platform. It was a fairly easy site to navigate. I used my phone which turned out to be the easiest device to use since I had to upload a photo of my passport.
To be clear, it is not required to use Visit Japan Web to enter Japan. You could provide all of your information on paper when you arrive in Japan, but it will be faster for you to do it digitally, since you can get in the line for the electronic declaration gate and use the QR code given to you through the website. Of course, please refer to the latest official advisories for how to properly enter Japan from your respective countries.
Ready, Set, Soar! (aka Traveling to Japan)
With months of preparation leading up to this moment, it was time to take flight! We flew out of Vancouver’s YVR International Airport and thankfully, there was barely any wait in the security lines. There had been recent reports that wait times were high, so we arrived 3 hours early just in case. We also wanted to leave time to accommodate for any setbacks.
On board the 10-hour Air Canada flight, we were brought two meals and a snack that were included in the ticket price. For airplane food, it was better than I expected. I had also brought my own snacks to get me through the rest of the flight.
I had never been on a flight as long as this before so I was not sure how I would handle it. The seats were not amazing but I used the complimentary pillow and blanket to feel more comfortable. I also made sure to stretch my legs occasionally to avoid fatigue.
Are We There Yet? (Tips Upon Landing, Before You Leave the Airport)
Customs went by fairly quickly and the process was efficiently set up. Completing the immigration and customs information online in advance really helped. Once we had our tourist visas and our bags, there were a couple of items on the to-do list before we could head for our hotel.
First, we picked up a pocket WiFi device from an AnyFone kiosk inside the airport which required a 40,000 yen (? $370 CAD) deposit and was then 13,000 yen (? $120 CAD) for the 14-day rental. This device was incredibly useful throughout our trip and I highly recommend pocket WiFi over a prepaid SIM, especially when travelling in a group. The device we rented could connect to a maximum of 10 devices. Make sure to bring portable chargers to keep all of your devices powered throughout your day.
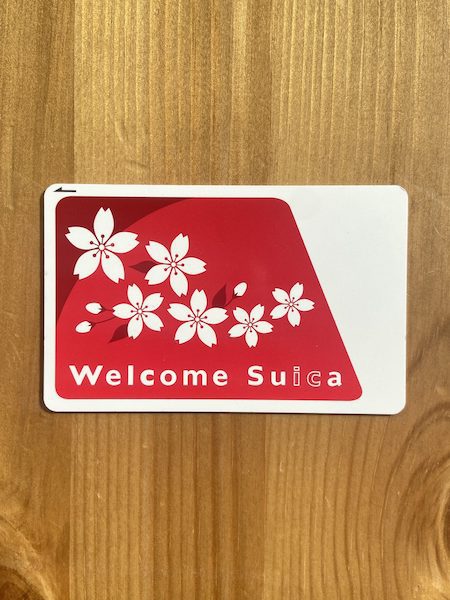
We then got a Suica e-money card and a Keisei Skyliner ticket to get us from the airport into central Tokyo. While the Skyliner required its own ticket, we used the reloadable Suica card for almost all of the trains that we took during our stay. It could also be used as a payment method at certain vending machines and stores. This was nice because any remaining balance on the card could be used to get some snacks at the end of the trip. The train system in Tokyo, and many other parts of Japan, have English translations on the signs, which makes it easy to navigate around as an English speaking foreigner.
Tune in to our:
Disclaimer: There are affiliate links in this post. If you make a purchase after clicking on one of these links, we may receive a small commission at no extra cost to you. This commission contributes to paying our writers for their storytelling. We only post links to things that we ourselves have tried.
Leave a Reply